Materialize CSS Simple Raised Button Customization

Learn about Materialize CSS Simple Raised Button Customization.

Introduction:

Buttons are one of the most widely used elements in any of the HTML Frameworks. No wonder it is going to be different in Materialize CSS Framework. There are several types of buttons that are present in Materialize CSS Framework which includes Simple Button, Simply Raised Button, Flat Buttons, Floating Button, Fab Buttons, Disabled Buttons and much more. This tutorial will be brief about customizing a simple raised button and changing its style according to the need. 

Simple Button

In Materialize CSS it is easy to create a button. By simply adding “btn” class in <a> will produce a simple raised button with teal colour. Teal is the default colour that Materialize CSS Framework produces when no colour is specified. 

<a href="#" class="btn">Test</a>
Simple Raised Button

Changing Color in Simple Button

It is easy to change the colour of buttons in Materialize CSS Framework. By simply adding the colour name as prescribed in the Materialize CSS Framework Color Palette with the class will produce preferred colours. 

Link for Color Palette:

http://materializecss.com/color.html

Now in order to change the default Teal colour of the button to Dark, Red, we can add the class red darken-4 class inside the Class. This will produce a Simple Raised button with a Dark Red colour. 

<a href="#" class="btn red darken-4">Test</a>
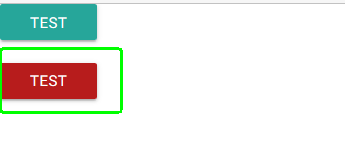
Red Button

We can either darken the main colour by adding darken class next to the prime colour. Materialize CSS give 4 variations for darkening as well as for lightening and accent shades. You can play around and produce several colour variations according to the need. 

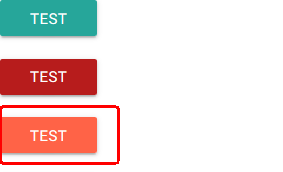
We can also apply a new colour that is not present in the Materialize CSS using CSS properties. For example, if I wish to add orange colour with hex code: #FF6347, the following method will help in adding custom colour to the button.

<a href="#" class="btn" style="background-color: #FF6347">Test</a>
Materialize CSS Simple Raised Button Customization
Custom Colour Button in Materialize CSS

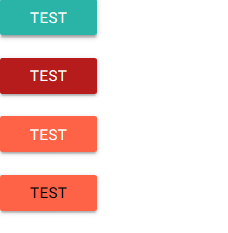
In the above Orange Button, if you wish to change the text colour to Black, the coding is as follows:

<a href="#" class="btn" style="background-color: #FF6347; color:black">Test</a>
Simple Raised Button with Black Text

Changing Button Size

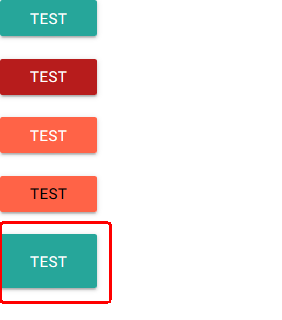
There is a default option in Materialize CSS Framework to increase the size of the button. By simply adding btn-large class next to btn class will increase the size of the button.

<a href="#" class="btn btn-large">Test</a> 
Button Large

Disabled Button

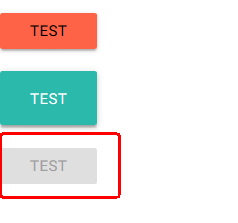
Materialize CSS provides an easy option to add a button disable property to a button. Simply adding a disabled class next to the btn class will create a Disabled Button. 

<a href="#" class="btn disabled">Test</a>
Button Disabled

Waves Effect

Wave is an external library that produces an ink ripple effect in button components. Materialize CSS provides a waves effect to buttons. The waves effect can be added to any button by simply adding the class waves-effect next to the btn class. This produces an ink ripple effect when a button is clicked. Furthermore, waves have several options which can be implemented in buttons. Let’s discuss everything in detail.

Simple Waves Effect

Waves-effect creates an ink wave effect in a button. The colour of the waves will be similar to that of the button colour. 

<a href="#" class="btn waves-effect">Test</a>

Waves Light

Waves-light class, when applied along with the Waves-effect, will produce ink waves in white colour. These effects can be utilized in various scenarios where the white tint is required. 

Waves Color

In Materialize CSS, there are several predefined waves colour that can be utilized in the button. Materialize CSS offers various Wave Colors such as White, Red, Yellow, Orange, Purple, Green, and Teal. These predefined waves colour can be directly called by adding respective classes such as waves-red, waves-green, etc.

<a href="#" class="btn waves-effect waves-red">Test</a>

Colour of the waves can be customized by creating new classes, for example, if you require brown waves effect you can use the following CSS

.waves-effect.waves-brown .waves-ripple {‘
 background-color: rgba(121, 85, 72, 0.65);
}
<a href="#" class="btn white black-text waves-effect waves-brown">Test</a>

Button with Icons

Materialize CSS provides an easy way to integrate icons into Buttons. In order to add icons to buttons, we need to add Google Material Icons CDN to the Website. After adding CDN, it is easy to call the icon in a button. We can change the icon as per our requirement by cross-referencing with the Google Material Icon list. The following coding will explain how icons are added to the button.

<a class="waves-effect waves-light btn"><i class="material-icons left">cloud</i>button</a>

You can also check the Materialize Card Animation Tutorial.

Materialize Card Animation

Learn Materialize Card Animation and implement in your projects

Materialize Card Animation – Introduction:

Materialize CSS Framework provides several card layouts which include Simple Card, Card with Image, Card with Action, Horizontal Cards, etc. There are several instances where web developers require card animation. For example, when a mouse hovers on a card, it should rotate and reveal the new card. There is no default option in Materialize CSS Framework to animate a card, this tutorial/plugin will enable the web developers to animate a card, i.e., on hovering over the card it will rotate 360 degrees horizontally and will display a new card with different information on it. Let’s get started.

Step 1

Create a dummy Materialize CSS framework template from the Materialize CSS website. You can either use CDN method or download the respective CSS and JS file from the website. In this tutorial, we have utilized CDN, alternatively, you can download the files and add the CSS and JS links in the HTML file.

http://materializecss.com/getting-started.html

Step 2

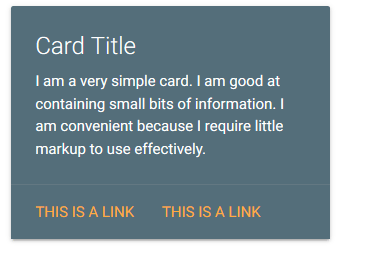
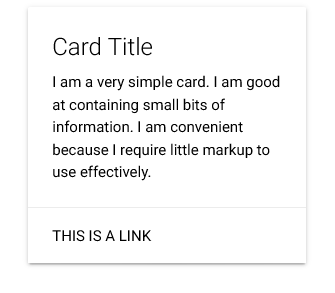
After creating the dummy Materialize CSS template, add the Materialize CSS card from the Materialize CSS website. In the tutorial, we have opted the Simple Materialize CSS card. Note that in the tutorial we have changed the color of the card and text on the card. However, these attributes can be changed according to the requirement. Furthermore, we have fixed the width of the card to M4 for the demo, even this can be changed according to the requirement.

<div class="row">
<div class="col s12">
<div class="card white">
<div class="card-content black-text">
<span class="card-title">Card Title</span>
<p>
I am a very simple card. I am good at containing small bits of information.I am convenient because I require little markup to use effectively.
</p>
</div>
<div class="card-action">
<a href="#" class="black-text">This is a link</a>
</div>
</div>
</div>
</div>
Materialize CSS Card

Step 3

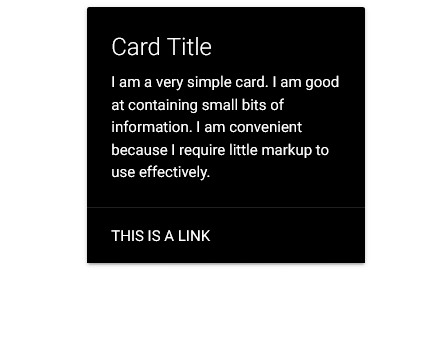
Once we have added the Simple Card, we can now add the functionality for hover to rotate the card. Basically, the functionality here is to rotate the card to reveal a new card when hovered over the inserted card. In order to achieve this Materialize Card Animation, we will be leveraging several CSS properties such as Transform, Perspective, Transform Style, Transition, Z-Index. The respective CSS and HTML script are given. We have differentiated the Front View Card and Back View Card with the classes Front and Back. Ideally, the card inside the Front class is the default card and the card inside the Back class is the card with will appear on hover.

CSS Properties to be added

/* entire container, keeps perspective */
                .flip-container {
                    perspective: 1000px;
                }
                    /* flip the pane when hovered */
                .flip-container:hover .flipper, .flip-container.hover .flipper {
                        transform: rotateY(180deg);
                    }
                .flip-container, .front, .back {
                    width: 300px;
                    height: 480px;
                }
                /* flip speed goes here */
                .flipper {
                    transition: 0.6s;
                    transform-style: preserve-3d;
                    position: relative;
                }
                /* hide back of pane during swap */
                .front, .back {
                    backface-visibility: hidden;
                    position: absolute;
                    top: 0;
                    left: 0;
                }
                /* front pane, placed above back */
                .front {
                    z-index: 2;
                    /* for firefox 31 */
                    transform: rotateY(0deg);
                }
                /* back, initially hidden pane */
                .back {
                    transform: rotateY(180deg);
                }

HTML Code

<div class="row">
      <div class="col m4 offset-m4 s12">
    <div class="flip-container" ontouchstart="this.classList.toggle('hover');">
	<div class="flipper">
            <div class="front">			
              <div class="row">
                <div class="col s12 m12">
                      <div class="card black darken-1">
                        <div class="card-content white-text">
                          <span class="card-title">Card Title</span>
                          <p>I am a very simple card. I am good at containing small bits of information.
                          I am convenient because I require little markup to use effectively.</p>
                        </div>
                        <div class="card-action">
                          <a href="#" class="white-text">This is a link</a>
                        </div>
                      </div>
                </div>
                </div>
            </div>
        <div class="back">			
              <div class="row">
                <div class="col s12">
                  <div class="card white">
                    <div class="card-content black-text">
                      <span class="card-title">Card Title</span>
                      <p>I am a very simple card. I am good at containing small bits of information.
                      I am convenient because I require little markup to use effectively.</p>
                    </div>
                     <div class="card-action">
                          <a href="#" class="black-text">This is a link</a>                 
                     </div>
                  </div>
                </div>
              </div>
        </div>
	</div>
</div>
          </div>
</div>
Materialize CSS Card Back Side
Materialize Card Animation
Materialize CSS Card Animation

Learn about Materialize CSS Nested Dropdown

Navbar with Autocomplete Search Box in 3 Easy Steps

Learn Navbar with AutoComplete Search Box and implement in your web project

The navigation bar is one of the important components in the website, which allows the user to navigate the website. Materialize CSS provides several variations, however, there are no variants with the Navigation bar with Search. For several websites, it requires a search box to be embedded in the Navigation Bar. The following tutorials will help you to embed the search bar in the Navigation Bar. The search functionality adapted in this tutorial is Autocomplete Search Bar provided in the Materialize CSS website.

Step 1:

Create a dummy Materialize CSS framework template from the Materialize CSS website. You can either use CDN method or download the respective CSS and JS file from the website. In this tutorial, we have utilized CDN, alternatively, you can download the files and add the CSS and JS links in the HTML file.

http://materializecss.com/getting-started.html

<!DOCTYPE html>
<html>
<head>
<!--Import Google Icon Font-->
<link href="http://fonts.googleapis.com/icon?family=Material+Icons" rel="stylesheet">
<!--Import materialize.css-->
<link rel="stylesheet" href="https://cdnjs.cloudflare.com/ajax/libs/materialize/0.98.1/css/materialize.min.css">
<!--Let browser know website is optimized for mobile-->
<meta name="viewport" content="width=device-width, initial-scale=1.0"/>
</head>
<body>

<!--Import jQuery before materialize.js-->
<script type="text/javascript" src="https://code.jquery.com/jquery-2.1.1.min.js"></script>
<script src="https://cdnjs.cloudflare.com/ajax/libs/materialize/0.98.1/js/materialize.min.js"></script>
</body>
</html>

Step 2

Once you have created the template, the next step will be adding Navigation Bar to the HTML.

<nav>
<div class="nav-wrapper">
<a href="#" class="brand-logo">Logo</a>
<ul id="nav-mobile" class="right hide-on-med-and-down">
<li><a href="sass.html">Sass</a></li>
<li><a href="badges.html">Components</a></li>
<li><a href="collapsible.html">JavaScript</a></li>
</ul>
</div>
</nav>
Basic Navbar using Materialize CSS

Step 3:

After inserting the Navigation Bar, we need to customize the Navigation Bar according to our needs. Here, we have changed the colour of the Navigation Bar to white and fixed the Autocomplete Search Box in the Navigation Bar, however, these can be customized by tweaking the CSS property.

<nav class=”white”> will change the Navbar to white

Since all the text in the HTML file is in white colour, we need to change the colour to red. This can be done by simply adding class=”red-text” inside the respective elements.

Once we have changed the font colour to red, we need to insert the autocomplete search from the Materialize CSS and add the respective js in the script section.

<div class="row">
<div class="col s12">
<div class="row">
<div class="input-field col s12">
<i class="material-icons prefix">textsms</i>
<input type="text" id="autocomplete-input" class="autocomplete">
<label for="autocomplete-input">Autocomplete</label>
</div>
</div>
</div>
</div>
<script>
$(document).ready(function(){                 
$('input.autocomplete').autocomplete({
data: {
"Apple": null,
"Microsoft": null,
"Google": null,
"Gargle":null
}
});                
});
</script>       

Once the autocomplete is added we need to fix the location of the autocomplete search box in the Navigation Bar. In order to achieve it, we should add the aforementioned HTML script in <li> element on the Navigation Bar just above the Menu Items.

After inserting the Autocomplete Search Box in the Navigation Bar, we need to fix the alignment issues. In order to achieve perfect alignment keeping in mind not to affect other autocomplete search boxes, we can ID the current autocomplete search as “topbarsearch” and write CSS properties for this ID.

 <!DOCTYPE html>
  <html>
    <head>
      <!--Import Google Icon Font-->
      <link href="http://fonts.googleapis.com/icon?family=Material+Icons" rel="stylesheet">
      <!--Import materialize.css-->
       <link rel="stylesheet" href="https://cdnjs.cloudflare.com/ajax/libs/materialize/0.98.1/css/materialize.min.css">
      <!--Let browser know website is optimized for mobile-->
      <meta name="viewport" content="width=device-width, initial-scale=1.0"/>
        <style>       
        #topbarsearch .input-field .prefix { 
            width:0rem !important;    
            }        
        #topbarsearch nav ul li:hover, nav ul li.active {
                background-color: none !important;
            }
        .input-field .prefix ~ input, .input-field .prefix ~ textarea, .input-field .prefix ~ label, .input-field .prefix ~ .validate ~ label, .input-field .prefix ~ .autocomplete-content{
            margin-left: 1rem !important;
            }
        </style>        
    </head>
    <body>         
        <nav class="white">
            <div class="nav-wrapper">
              <a href="#" class="brand-logo red-text">Logo</a>   
                <ul class="hide-on-med-and-down right">               
                    <li>    
                       <div class="center row">
                          <div class="col s12 " >
                            <div class="row" id="topbarsearch">
                              <div class="input-field col s6 s12 red-text">
                                <i class="red-text material-icons prefix">search</i>
                                <input type="text" placeholder="search" id="autocomplete-input" class="autocomplete red-text" >
                                </div>
                              </div>
                            </div>
                          </div>          
                      </li>                     
                    <li><a href="sass.html" class="red-text">Sass</a></li>
                    <li><a href="badges.html" class="red-text">Components</a></li>
                    <li><a href="collapsible.html" class="red-text">JavaScript</a></li>
                </ul>
            </div>
          </nav>        
      <!--Import jQuery before materialize.js-->
      <script type="text/javascript" src="https://code.jquery.com/jquery-2.1.1.min.js"></script>
      <script src="https://cdnjs.cloudflare.com/ajax/libs/materialize/0.98.1/js/materialize.min.js"></script>
      <script>
            $(document).ready(function(){                 
                $('input.autocomplete').autocomplete({
                data: {
                    "Apple": null,
                    "Microsoft": null,
                    "Google": null,
                    "Gargle":null
                }
                });                
                });
      </script>        
    </body>
  </html>
Navbar with Autocomplete Search Box

The required Navbar with autocomplete search box is thus created. Note that, the colour and alignment of this search box and navigation bar can be customized by changing the CSS property accordingly.

Learn about Nested Dropdown in MaterializeCSS.

Nested Dropdown in Materialize CSS in Easy 3 steps

Learn how to create Nested Dropdown in Materialize CSS

Nested dropdown is one of the most important elements web developers look for while designing the website. Materialize CSS Framework does not offer nested dropdown in their repository. In this tutorial, you will be learning how to create a nested dropdown menu in Materialize CSS framework. 

Creating Dropdown Button:

Initially, we need to insert the dropdown button from the Materialize CSS Framework. We need to add the respective JS for the dropdown menu.

Step 1: 

Create an HTML template from the Materialize CSS official website. Use the following link:

http://materializecss.com/getting-started.html


  <!DOCTYPE html>
  <html>
    <head>
      <!--Import Google Icon Font-->
      <link href="http://fonts.googleapis.com/icon?family=Material+Icons" rel="stylesheet">
     <!-- Compiled and minified CSS -->
     <link rel="stylesheet" href="https://cdnjs.cloudflare.com/ajax/libs/materialize/0.98.0/css/materialize.min.css">
     

      <!--Let browser know website is optimized for mobile-->
      <meta name="viewport" content="width=device-width, initial-scale=1.0"/>
    </head>

    <body>
      <!--Import jQuery before materialize.js-->
      <script type="text/javascript" src="https://code.jquery.com/jquery-2.1.1.min.js"></script>
        <!-- Compiled and minified JavaScript -->
  <script src="https://cdnjs.cloudflare.com/ajax/libs/materialize/0.98.0/js/materialize.min.js"></script>
    </body>
  </html>

Step 2:

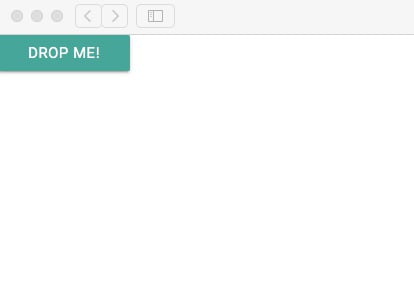
Add the DropDown button as given on the website. Use the following link: 

http://materializecss.com/dropdown.html

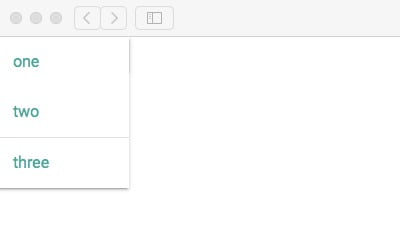
Dropdown Code
Dropdown Button
Dropdown Open

Step 3:

We can now add the nested dropdown in created dropdown button.

  1. In the last list item in <ul>, we can now copy paste the classes for the dropdown menu. 
  2. Change the data-activates option to dropdown2 and change the class name to dropdown-button2
  3. Insert the following javascript within the script tag.
  4. Add the following style just above the </head> tag
 <html>
    <head>
      <!--Import Google Icon Font-->
      <link href="http://fonts.googleapis.com/icon?family=Material+Icons" rel="stylesheet">
      <!--Import materialize.css-->
      <link rel="stylesheet" href="https://cdnjs.cloudflare.com/ajax/libs/materialize/0.98.0/css/materialize.min.css">
      <!--Let browser know website is optimized for mobile-->
      <meta name="viewport" content="width=device-width, initial-scale=1.0"/>
      <style>.dropdown-content{
    overflow: visible !important;
}</style>
    </head>

    <body>
     <a class='dropdown-button btn' href='#' data-activates='dropdown1' data-beloworigin="true">Drop Me!</a>
        <ul id='dropdown1' class='dropdown-content'>
            <li><a href="#!">one</a></li>
            <li><a href="#!">two</a></li>
            <li class="divider"></li>
            <li>
                <a class='dropdown-button2' href='#' data-activates='dropdown2'>Dropdown></a>
            </li>
        </ul>
        <ul id='dropdown2' class='dropdown-content'>
            <li><a href="#!">one</a></li>
            <li><a href="#!">two</a></li>
        </ul>
        
      <!--Import jQuery before materialize.js-->
      <script type="text/javascript" src="https://code.jquery.com/jquery-2.1.1.min.js"></script>
      <script src="https://cdnjs.cloudflare.com/ajax/libs/materialize/0.98.0/js/materialize.min.js"></script>
      <script>
        $(document).ready(function(){
          $('.dropdown-button2').dropdown({
              inDuration: 300,
              outDuration: 225,
              constrain_width: false, // Does not change width of dropdown to that of the activator
              hover: true, // Activate on hover
              gutter: ($('.dropdown-content').width()*3)/2.5 + 2, // Spacing from edge
              belowOrigin: false, // Displays dropdown below the button
              alignment: 'left' // Displays dropdown with edge aligned to the left of button
            }
          );
         
        });
        </script>
    </body>
  </html>
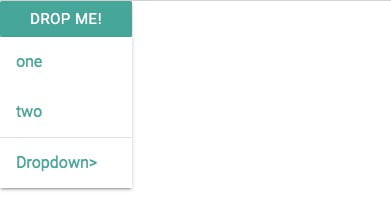
Nested Dropdown Button
Nested Dropdown in Materialize CSS
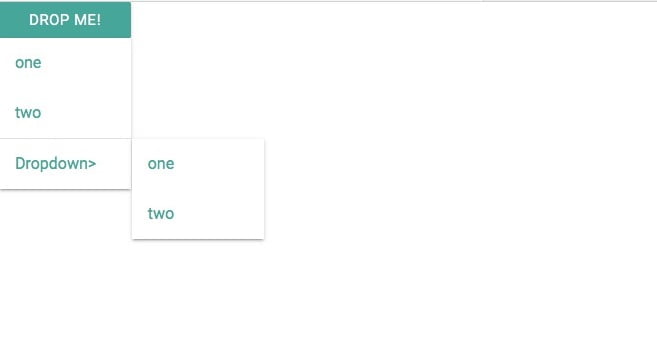
Nested Dropdown Open

We have successfully created the nested dropdown in Materialize CSS framework.

In this tutorials series, you’ll learn more Materialize CSS Plugins, Working Codes and tutorials. In the next tutorial, you’ll learn how to create Navbar with Autocomplete Search Box