Learn how to install R Studio in 10 easy steps and get starting with R IDE
Please note that before installing R Studio, you must install R Programming on your computer. You can learn to install R Programming from his link.
With a consideration that you have successfully installed R Programming. Follow these 10 steps to successfully install R Studio on your computer. Here we have demonstrated R Studio installation in Windows 10 and you can also install it on your Mac or Linux computers with the same procedure.
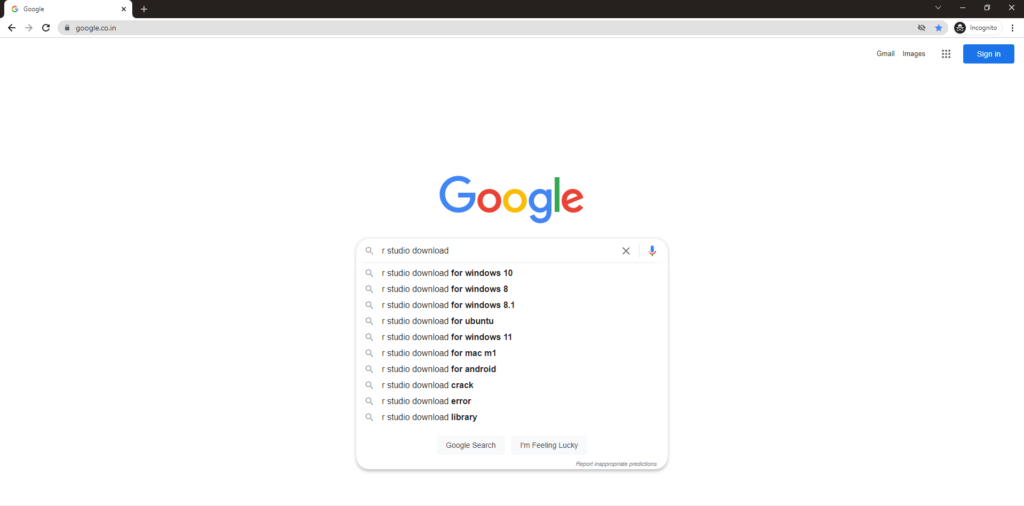
Step 1: Search in Google with the keyword R Studio download.
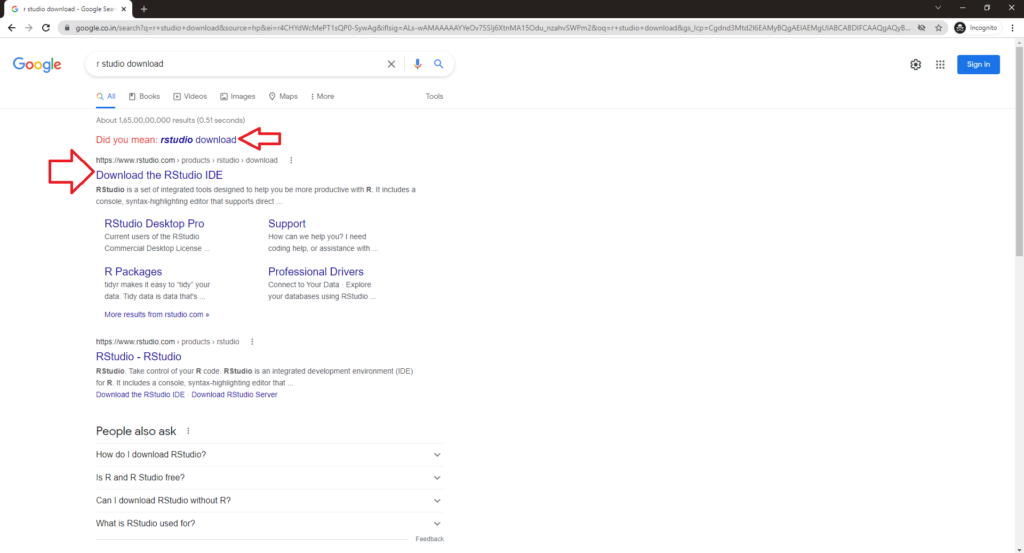
Step 2: Click on the first link from rstudio.com with the title “Download the RStudio IDE”
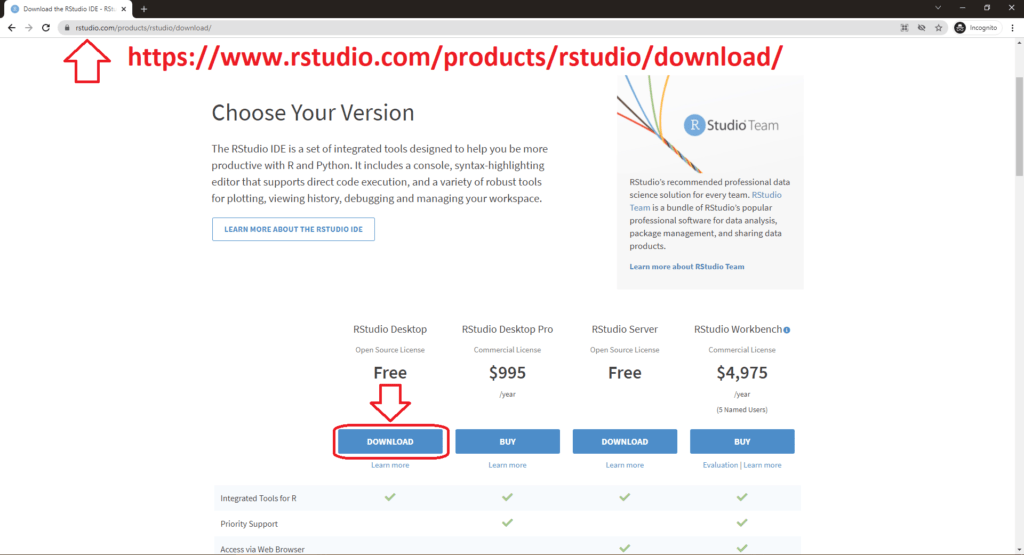
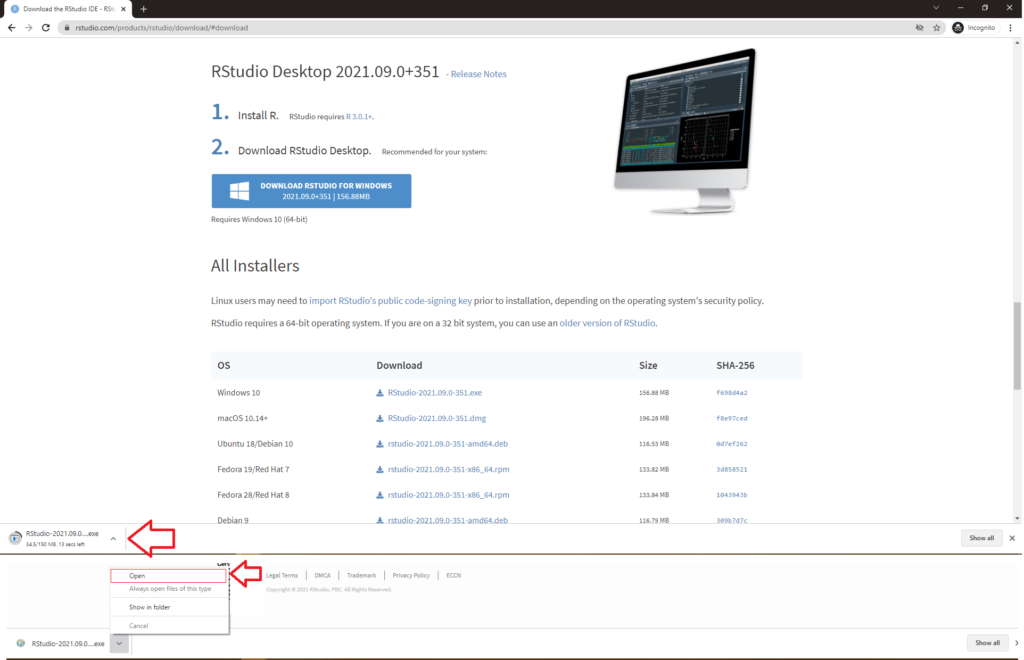
Step 3: Inside the website, scroll down a bit to find various versions of R Studio. For Open Source usage you can go with the Free Version. Click on the Download icon under the Free Version
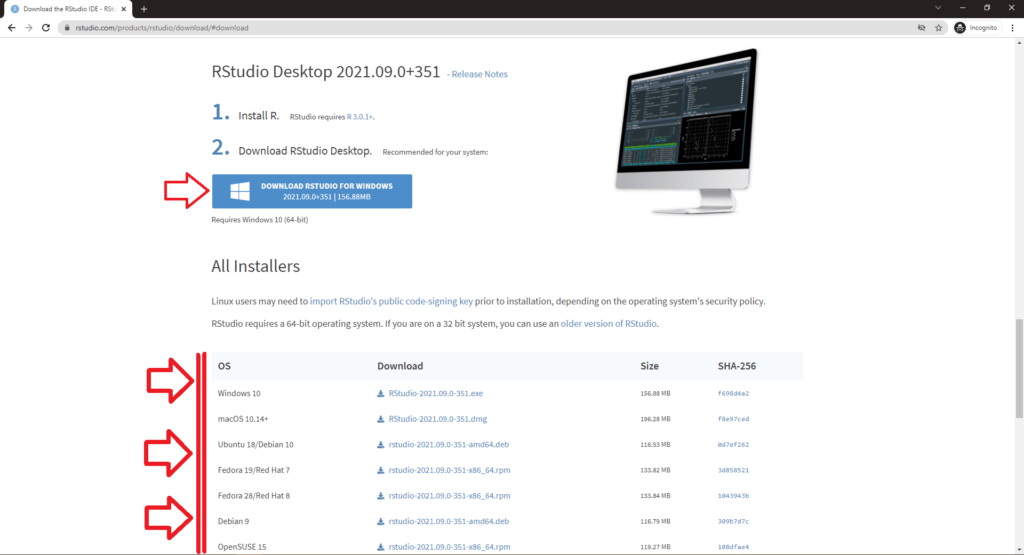
Step 4: If you’re using Windows 10. Click on the Download RStudio for Window button. If you’ve Linux or Mac OS you can check the section below where you can find the links to download RStudio for respective OS.
Step 5: If you’re using Chrome, you can find the download progress in the bottom. Once the download is complete you can click on the file to Open
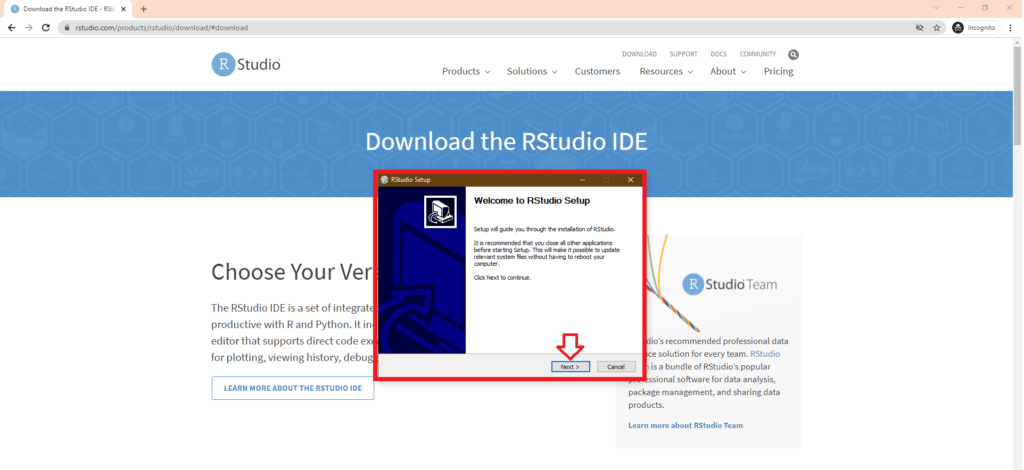
Step 6: Click on the Next Button in the Welcome Screen of RStudio Installation
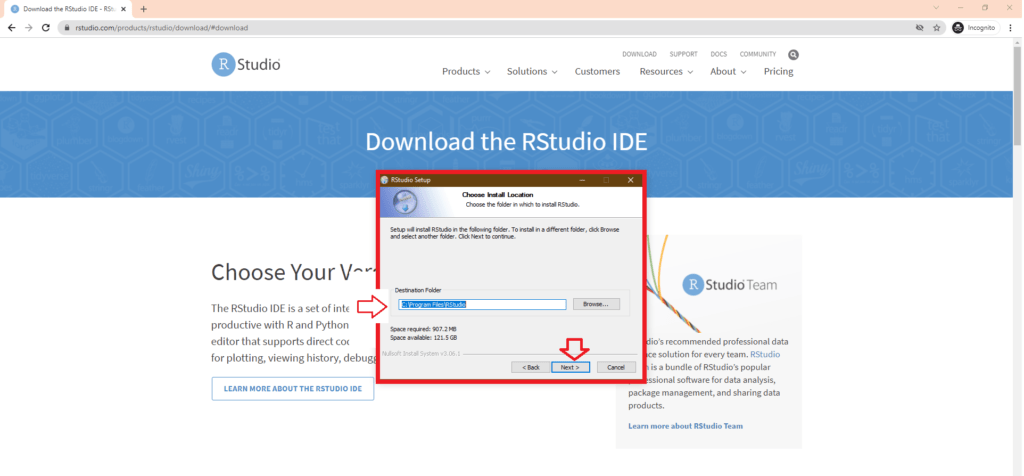
Step 7: Choose the Install Location and click on Next. You can either leave it to the default location or you can change your path based on your preference.
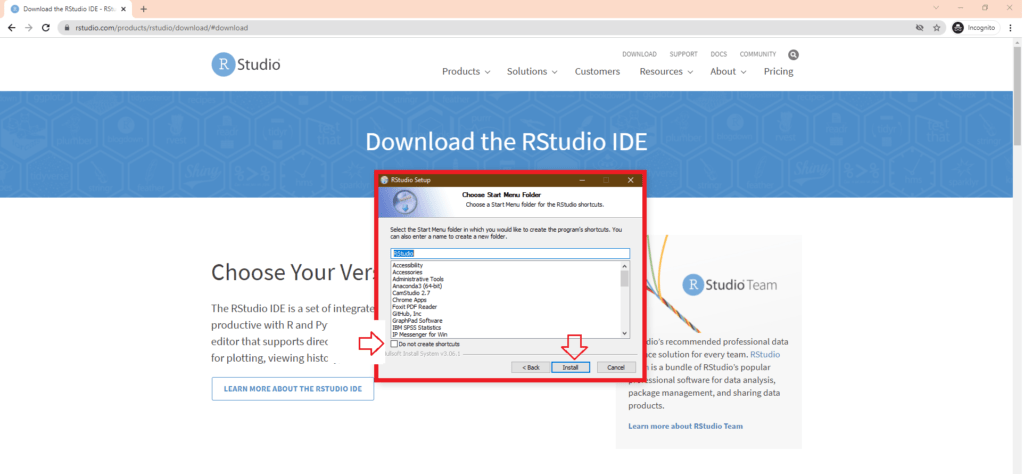
Step 8: Choose Start Menu Folder in the Next Installation Screen and click Next
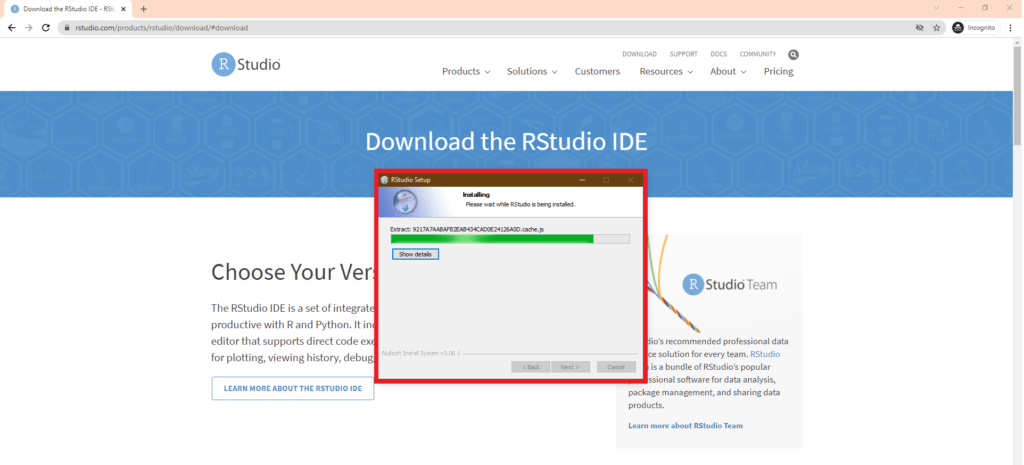
Step 9: Wait till the RStudio Installation process is complete
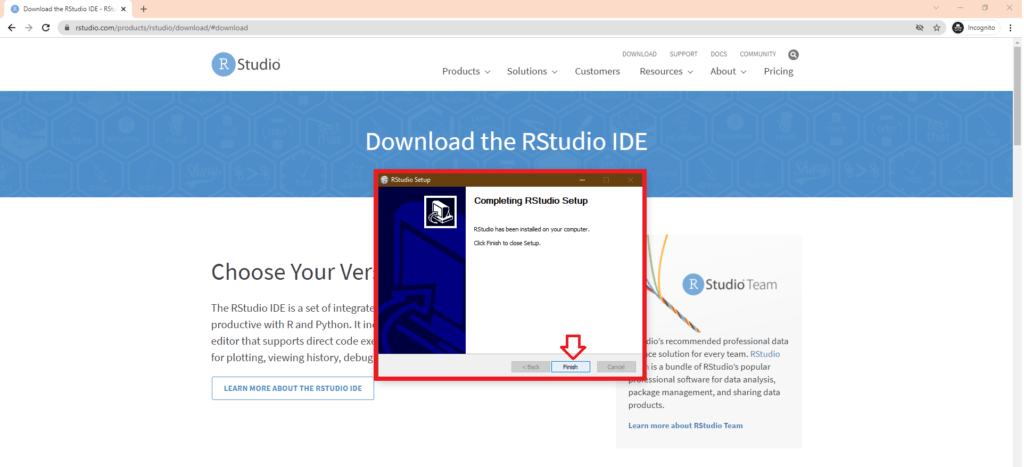
Step 10: Click on Finish to complete R Studio installation in Windows 10.
You can follow the same step to Download and Install R Studio in Windows 11 as well.
Please do check R Programming training from Ampersand Academy.
